Introduction
It’s easy to implement the ability to switch views of 3D CAD models in the documents you create using Teigha Publish.
This article describes how to switch the view of an OdAnnotation object using JavaScript. There are two functions in the OdAnnotation class:
void setCarouselButtons(const OdStringArray& button_names, const OdString& previous_button_name, const OdString& next_button_name, OdUInt16 scroll_size);

void setCarouselViews(const OdUInt32Array& indices, const OdImagePtrArray& images);
These functions are used to create a group of view-switch buttons that occupy the lower part of the OdAnnotation object area. In this article we’ll add custom view-switching buttons to an arbitrary location of the created document.
The basics
Create an instance of the OdDocument class, add the page where the OdAnnotation object is located, load the .prc file into the OdCADModel object, and add it to OdAnnotation:
OdFilePtr pPublisher = OdFile::createObject();
TEST_ASSERT(!pPublisher.isNull());

OdDocumentPtr pDoc = OdDocument::createObject();
pDoc->setInformation(L"Test Document", L"Author", L"Test", L"Oda Pdf Publish");
pDoc->setHostServices(pHostApp);

OdPagePtr pPage = OdPage::createObject();
pPage->setOrientation(Page::kPortrait);
pDoc->addPage(pPage);


OdString sFile = L"CORE11713\\tank.prc";
OdString sIn = pHostApp->findFile(sFile);

OdRect rect;
rect.m_min.x = 1;
rect.m_max.x = 593;

OdGePoint3d maxP = OdGePoint3d(2.0257825851440430, 1.1199963092803955, 5.8764815330505389);
OdGePoint3d minP = OdGePoint3d(-1.0000000000000002, -1.103692531585693, -2.2000000476837140);
OdGeExtents3d extPrc(minP, maxP);

OdCADModelPtr pModel = OdCADModel::createObject();
pModel->setSource(sIn);
OdAnnotationPtr pAnnot = OdAnnotation::createObject();
pAnnot->setSource(pModel);
pAnnot->setTransparentBackground(false);
pAnnot->setName(OdString().format(L"Test 3D Annotation%i", i));
pAnnot->setModelTreeVisibility(true);

pPage->addAnnotation(pAnnot, rect);
Next, we create an array of view names that will be used to perform the switching:
OdStringArray view_names;
view_names.push_back(L"Default");
view_names.push_back(L"Front");
view_names.push_back(L"Back");
view_names.push_back(L"Right");
view_names.push_back(L"Left");
view_names.push_back(L"Top");
view_names.push_back(L"Bottom");
Then create an instance of the OdArtwork class, and add the OdView objects to it using the addView utility function (see PublishTemplate* examples):
OdArtworkPtr pArtwork = OdArtwork::createObject();

double field_w = 100;
double field_h = 100;

//Front
addView(pArtwork, OdGePoint3d(0, -1, 0), OdGePoint3d::kOrigin, OdGeVector3d::kZAxis, view_names[1], view_names[1], Camera::kOrthographic, field_w, field_h, extPrc);
//Back
addView(pArtwork, OdGePoint3d(0, 1, 0), OdGePoint3d::kOrigin, OdGeVector3d::kZAxis, view_names[2], view_names[2], Camera::kOrthographic, field_w, field_h, extPrc);
//Right
addView(pArtwork, OdGePoint3d(1, 0, 0), OdGePoint3d::kOrigin, OdGeVector3d::kZAxis, view_names[3], view_names[3], Camera::kOrthographic, field_w, field_h, extPrc);
//Left
addView(pArtwork, OdGePoint3d(-1, 0, 0), OdGePoint3d::kOrigin, OdGeVector3d::kZAxis, view_names[4], view_names[4], Camera::kOrthographic, field_w, field_h, extPrc);
//Top
addView(pArtwork, OdGePoint3d(0, 0, 1), OdGePoint3d::kOrigin, OdGeVector3d::kYAxis, view_names[5], view_names[5], Camera::kOrthographic, field_w, field_h, extPrc);
//Bottom
addView(pArtwork, OdGePoint3d(0, 0, -1), OdGePoint3d::kOrigin, -OdGeVector3d::kYAxis, view_names[6], view_names[6], Camera::kOrthographic, field_w, field_h, extPrc);
//Default View
OdGePoint3d defCamPos(-0.90612681748501411, -0.37532908821626582, 0.19509553088993711);
OdGeVector3d defUpVec(0.18024483319542611, 0.074659669699104828, 0.98078424427943056);
addView(pArtwork, defCamPos, OdGePoint3d::kOrigin, defUpVec, view_names[0], view_names[0], Camera::kOrthographic, field_w, field_h, extPrc, Rendering::kDefault, Lighting::kDay, true);

pAnnot->setArtwork(pArtwork);
Example of switching to a view by name
The code below illustrates how to create view toggle buttons using view names:
static const OdChar* changeViewFuncJS =
L"function ChangeViewByName(pageIndex, annot_index, view_name) \n"
L"{                                                            \n"
L"  annot = this.getAnnots3D( pageIndex )[ annot_index ];      \n"
L"  if(annot != null)                                          \n"
L"  {                                                          \n"
L"    annot.context3D.runtime.setView(view_name);              \n"
L"  }                                                          \n"
L"}                                                            \n"
L"                                                             \n";

pDoc->addJavaScript(L"changeViewFuncJS", changeViewFuncJS);

OdRect button_rect(10, 60, 5, 55);
for (OdUInt16 i = 0; i < view_names.size(); ++i)
{
  OdButtonPtr pButton = OdButton::createObject();
  pButton->setName(view_names[i]);
  pButton->setLabel(view_names[i]);
  pPage->addButton(pButton, button_rect);
  button_rect.m_min.x += 70;
  button_rect.m_max.x = button_rect.m_min.x + 50;
  pPage->addJavaScriptActionByField(view_names[i], L"ChangeViewByName( this.pageNum, 0, \"" + view_names[i] + L"\");", Action::kButtonReleased);
}
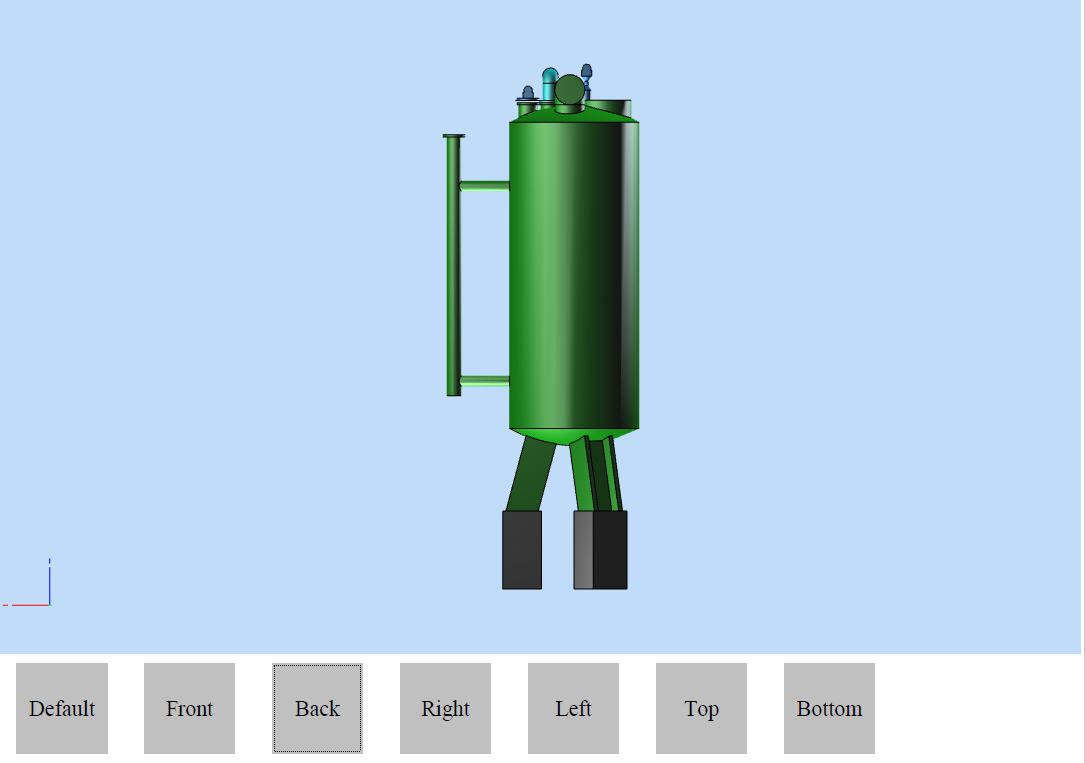
In this code, OdButton objects are created according to the number of predefined views of the OdAnnotation. A common part of the code for selecting a predefined view is made in a separate ChangeViewByName function at the document level. In JavaScript, the button's script contains only the code for calling this function with arguments: page number, annotation index on the page, and name of the predefined view. The result is shown below.

To control switching, you can use not only the OdButton button but also any other control that you assign to the JavaScript script.
Example of switching to a view by index
The code below illustrates creating view toggle buttons using view indexes:
static const OdChar* scrollViewFuncJS =
L"var current_view_index;                                 \n"
L"if(!current_view_index)                                 \n"
L"    current_view_index = 0;                             \n"
L"function ScrollToView(pageIndex, annot_index, next)     \n"
L"{                                                       \n"
L"  annot = this.getAnnots3D( pageIndex )[ annot_index ]; \n"
L"  if(annot != null)                                     \n"
L"  {                                                     \n"
L"    if(next)                                            \n"
L"    {                                                   \n"
L"      viewCount =  annot.context3D.runtime.viewCount;   \n"
L"      this.current_view_index += 1;                     \n"
L"      if(this.current_view_index >  (viewCount - 1))    \n"
L"        this.current_view_index = viewCount - 1;        \n"
L"    }                                                   \n"
L"    else                                                \n"
L"    {                                                   \n"
L"      current_view_index = current_view_index - 1;      \n"
L"      if(current_view_index < 0)                        \n"
L"        current_view_index = 0;                         \n"
L"    }                                                   \n"
L"    annot.context3D.runtime.setView(current_view_index);\n"
L"  }                                                     \n"
L"}                                                       \n";

pDoc->addJavaScript(L"scrollViewFuncJS", scrollViewFuncJS);

OdButtonPtr pPrevButton = OdButton::createObject();
OdString prev_button_name = L"previous";
pPrevButton->setName(prev_button_name);
pPrevButton->setLabel(prev_button_name);
pPage->addButton(pPrevButton, OdRect(5, 50, 425, 475));
pPage->addJavaScriptActionByField(prev_button_name, L"ScrollToView( this.pageNum, 1, false);", Action::kButtonReleased);

OdButtonPtr pNextButton = OdButton::createObject();
OdString next_button_name = L"next";
pNextButton->setName(next_button_name);
pNextButton->setLabel(next_button_name);
pPage->addButton(pNextButton, OdRect(540, 590, 425, 475));
pPage->addJavaScriptActionByField(next_button_name, L"ScrollToView( this.pageNum, 1, true);", Action::kButtonReleased);
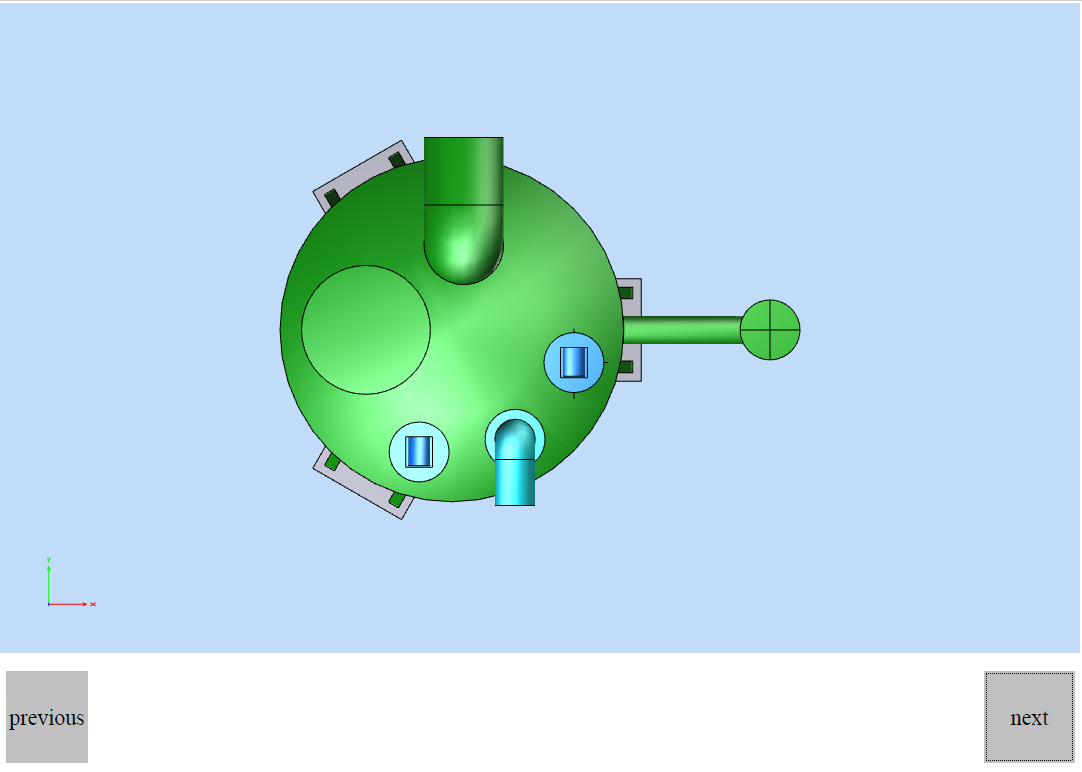
In this code, two buttons are created: previous and next. These buttons switch the predefined view to the previous and the next one according to its index. To store the current view index, use the global document level variable current_view_index. The switch script is also rendered in a separate function. The result of this code is shown below.


